Graphics, Part II: Scanning
Capturing Images
- A scanner is a device much like a fax machine or a photocopier
- Converts a paper image (or 3D object!) into digital form
- Line by line
- Reads the image one pixel-sized line at a time and converts it to a screen image
- Once in the computer, each of those pixels may be manipulated--allowing for endless creative potential
Scanning in Fireworks:
Step-by-Step
- Select File Menu, then Scan, and then Twain Acquire.
"Twain Select" must also be chosen the very first time a
particular computer tries to scan.
This starts the software that controls the scanner--allowing you to make several
settings.
- Each scanner's software looks different, but you should be able to do
certain standard settings of resolution and scanning mode (e.g., color vs.
black and white).
- Resolution (Dots Per Inch or DPI).
- Choose 72 dpi if going straight to the Web; or a higher resolution
if you're going to manipulate it.
- Anything over 300 is exessive.
- Scanning Mode (Bit Depth).
- Number of colors:
- Color - Full = millions colors
- Color - 256 (through 8)
- Gray - 256 (through 4)
- Line Art = 2 colors (black and white)
- Descreen (not available on all scanners).
- Use Descreen only if your original is a photographic image
from a newspaper, magazine or book.
- It prevents a distortion (a moire pattern) that occurs when
scanning a previously printed image.
- Select Preview to check the orientation of the original on the scanner.
- A preliminary version of the scan appears.
- Adjust the selection markers (the little dotted lines) to crop the image.
- Scan it by clicking on the Acquire or Scan button.
- Close scanning software in order to return to Fireworks.
- Manipulate it as you will!
- Save it in either Fireworks PNG format or export it to GIF
or JPEG format.
- Filename conventions:
- End with an extension: .png, .gif, .jpg or .jpeg
- No spaces!
- Use lowercase. Makes it easier to use files on a Unix system (e.g.,
bama.ua.edu)
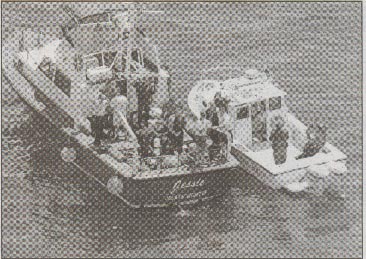
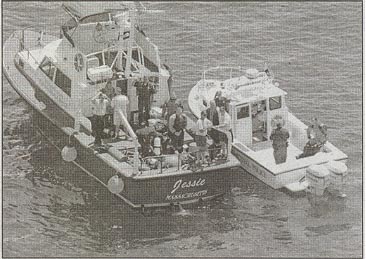
A Word About Moiré Patterns
Distortion (a moiré
pattern) can occur when scanning a previously printed image. For example,
this image was scanned from a newspaper:
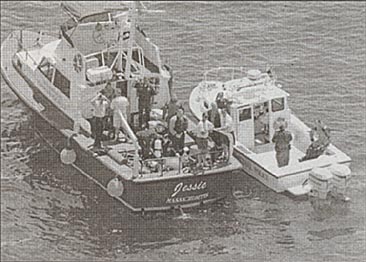
- Descreen
- Not available on all scanners, but many do have this option.
- Use Descreen only if your original is a photographic image from
a newspaper, magazine or book.
- The image above when scanned with Descreen selected:
- If you're using a scanner without a Descreen option, there are some techniques
in Adobe Photoshop that may eliminate moiré patterns. (I haven't
tried this out in Fireworks.)
- Lynda Weinman suggests (pp. 328-9):
- Scan the image at a higher resolution than 72 dpi. Try, for example,
150.
- Using Photoshop, go to the Filter menu, select Blur
and then, specifically, Gaussian Blur.
- Set Radius to 1.2 pixels--although you may need to set
this higher, depending on how it looks.
- The moiré pattern almost disappears--as
you can see here. But the image is blurred.
- Reducing the image size will also reduce the blurriness, but it's
still not as sharp as the image above.

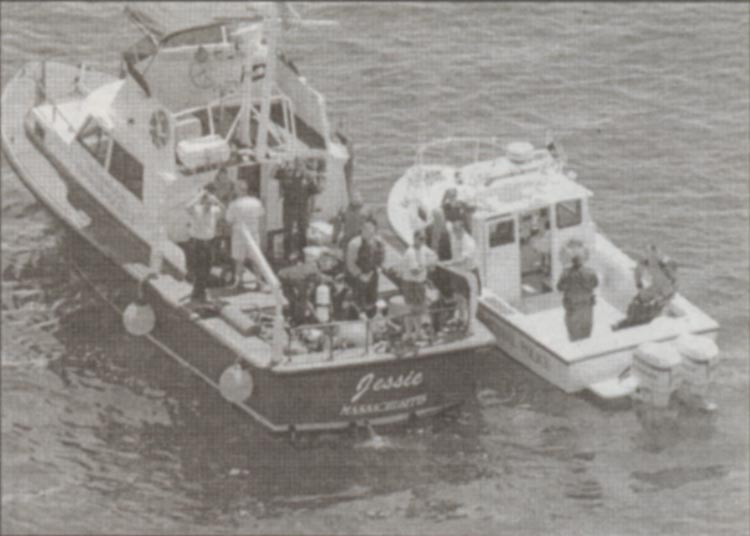
- From the Filter menu, select Sharpen, and then Sharpen
again (or Unsharp Mask--which allows for variable sharpening
of the image). Voila! A good-looking image with no moiré pattern:
Exercises:
- Scan an image at 300 dpi. Save as test300.jpg.
- Scan an image at 72 dpi. Save as test72.jpg.
- Scan an image in maximum number of colors (highest bit depth). Save as
testbd.jpg.
- Scan an image in greyscale. Save as testgs.jpg.
- Scan a photograph from a magazine at 200 dpi and do not use Descreen.
Save as test200nds.jpg.
- Scan a photograph from a magazine at 200 dpi and do use Descreen.
Save as test200ds.jpg.
- Scan a photograph from a magazine at 72 dpi and do not use Descreen.
Save as test72nds.jpg.
Last updated: May 18, 2000 8:19 PM
Comments: jbutler@ua.edu