Creating Image Maps in Dreamweaver


Two Types of Image Maps

  1. Client-side image maps.
  2. Server-side image maps.

Create a client-side image map:

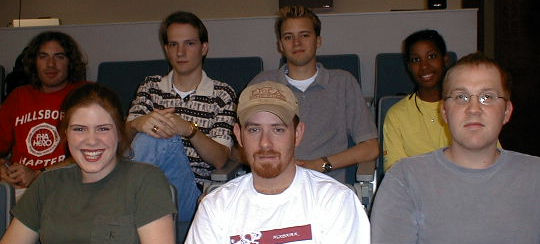
1 For this tutorial we'll make an image map from the class photo. Nab it from here and put it in a new HTML document in Dreamweaver.
2 Select this image (a box appears around it when you do) and check for the the Map Name Field (the little box) in the lower left hand corner of the Property Inspector.

(You may need to click the [expander arrow] in the lower right corner of the Property inspector to see the Map box.)
3 Type the name for the map in the Map Name box. For instance, enter "TCF389" (no quotation marks) in this box.
4 Select a drawing tool (rectangle, circle or polygon) and drag the cursor over the image of a classmate's face to draw a shape. You have just made his/her face a hotspot (doesn't he/she look flushed?). When this hotspot is selected, the Hotspot Inspector appears beneath the Property Inspector.
5 Type the classmate's homepage's URL for the hotspot in the Link box. (You'll find it on the Student Webs page.)
6 Optional, when using frames: To make the linked document appear somewhere other than the current window or frame, choose a frame name from the Target option.
7 You may type "alternate" text in the Alt box--as you would in any <IMG> tag. For example, enter "TCF389 Web pages" (no quotation marks) in this box.
8

When finished defining hotspots, close the Hotspot Inspector. The HTML code for an image map will be inserted into your document and will look something like:

<img src="TCF3892000.jpg" width="540" height="244" usemap="#TCF389" border="0">
                 
<map name="TCF389">
<area shape="circle" coords="427,60,28" href="http://www.tcf.ua.edu">
</map>

How does it work?

The <map name="TCF389"> tag establishes the name of the map. The lines between it and </map> set the coordinates ("coords") for the map. To be specific, the map creates a circular hotspot that starts at point 427 pixels to the right and 60 pixels down (the x and y axes); and is 28 pixels wide.

Then, by adding usemap="#TCF389" to a standard <IMG> tag we tell the browser to use the map named "TCF389" with a particular image (TCF3892000.jpg, in this case).
9 Test your image map by previewing it in MS IE or Netscape Navigator. When you're finished, show your image map to your instructor.


Notes:

If you wish to have a default URL--that is, the link that a user will make if he/she does not click on a specific hotspot--add the following to your code:

<area shape="default" href="insert default URL here">

To select multiple hotspots in an image map:

Select the image and either (1) shift-click the other hotspots you want to select or (2) press Control+A (Windows) or Command+A (Macintosh) to select all hotspots.

If two hotspots overlap, the first hotspot is dominant.

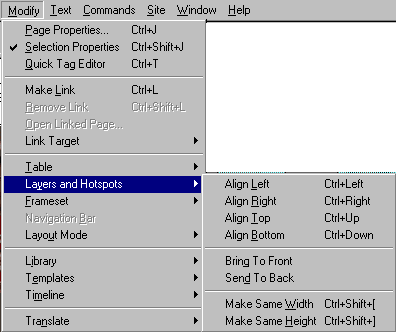
You can go to the Modify Menu and choose Layers and Hotspots to align the hotspots, bring them to the front or send them to the back, or make them the same width and height.


Last revised: May 26, 2000 8:26 AM
Comments: jbutler@ua.edu