TCF389: Graphics, Part II
Scanning & Transparent GIFs
Capturing Images
-
A scanner is a device much like a fax machine or a photocopier
-
Converts a paper image (or 3D object!) into digital form
-
Line by line
-
Reads the image one pixel-sized line at a time and converts it to a screen
image
-
Once in the computer, each of those pixels may be manipulated--allowing for
endless creative potential
Scanning in Photoshop: Step-by-Step
-
Select File Menu, then Import..., and the name of the scanning
device [e.g., Twain_32] attached to the computer. This starts ScanWizard,
the software that controls the scanner--allowing you to make several
settings.
Settings
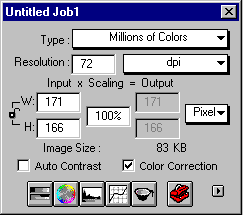
Window:

-
Resolution (Dots Per Inch or DPI).
-
Choose 72 dpi if going straight to the Web; or a higher resolution if you're
going to manipulate it.
-
Anything over 300 is exessive.
-
Type: (Bit Depth).
-
Number of colors:
-
Millions of Colors = 16.7 million colors
-
256 Shades of Gray
-
Line Art = 2 colors (black and white)
-
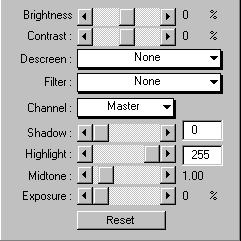
Descreen (optional).
-
Click on small button to right of the
toolbar

to bring up additional settings such as
Descreen:

-
Use Descreen only if your original is a photographic image from
a newspaper, magazine or book.
-
It prevents a distortion (a moire pattern) that occurs when scanning
a previously printed image.
-
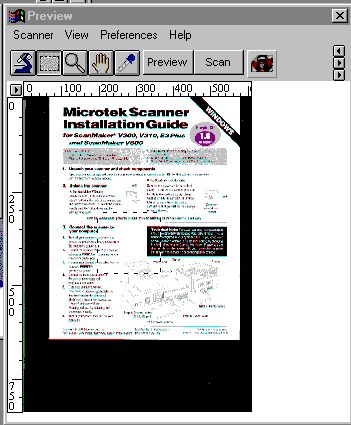
Select preview in the Preview Window to check the orientation
of the original on the
scanner.

-
Adjust the selection markers (the little dotted lines) to crop the image.
-
Scan it by clicking on the Scan button.
-
Close ScanWizard in order to return to Photoshop.
-
Manipulate it as you will!
-
Save it in either Photoshop, CompuServe GIF or JPEG format.
-
Filename conventions:
-
End with an extension: .psd, .gif, .jpg or .jpeg
-
No spaces!
-
Use lowercase. Makes it easier to use files on a Unix system (e.g., bama.ua.edu)
Exercises:
-
Scan an image at 300 dpi. Save as test300.jpg.
-
Scan an image at 72 dpi. Save as test72.jpg.
-
Scan an image in true color (maximum bit depth). Save as testbd.jpg.
-
Scan an image in greyscale. Save as testgs.jpg.
-
Scan a photograph from a magazine at 200 dpi and do not use Descreen.
Save as test200nds.jpg.
-
Scan a photograph from a magazine at 200 dpi and do use Descreen.
Save as test200ds.jpg.
-
Scan a photograph from a magazine at 72 dpi and do not use Descreen.
Save as test72nds.jpg.
-
Manipulate your phograph from #6 using Photoshop filters. Save
as...whatever.
Transparent Images
-
Often you need to have an image appear to float over your Website's
background--like this beetle.
-
To do so, you need to make part of the image "transparent." This only
works with GIF files (not JPEG).
-
Note: And you must use GIF89a format and not GIF87a. (89a was announced
in 1989 and 87a in 1987.) Also, transparency does not affect file
size.
-
Until recently, Photoshop handled this quite poorly and required a plug-in
(see Weinman, pp. 178-79).
-
Many Web designers used other graphics software for this task
-
E.g., DeBabelizer (Mac, expensive) and LView (Windows)
-
Photoshop Version 4, however, is a bit smarter about it.
Transparent GIFs in Photoshop: Step-By-Step
-
Even though "CompuServe GIF" is a choice in Photoshop's "Save As" dialog
box, you cannot create a transparent GIF this way!
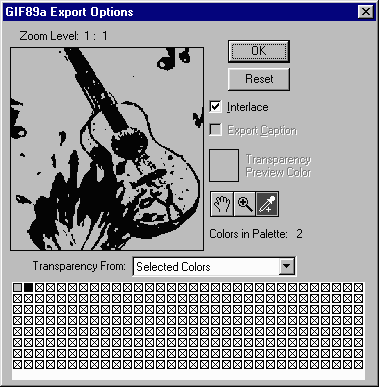
Instead, you must go to the File Menu and select Export and
then GIF89a Export...

-
With the
 eyedropper tool selected (as above), click on the area that you
want to be transparent. This selects the color of that area to be transparent.
Photoshop indicates this by turning that color gray (as above).
(A pallette showing all the colors in the image is displayed, too. You can
also use the eyedropper to select from there.)
-
Select "OK" and you're done!

The Anti-aliasing Issue
-
Anti-aliased images cause problems for transparent GIFs--e.g., the
white clutter around the edge of our beetle.
-
Weinman explains the problem in detail (pp. 172-4)
-
DEMO: PSantialias.gif. Look closely
at the edges

-
Images must be aliased before being made transparent.
-
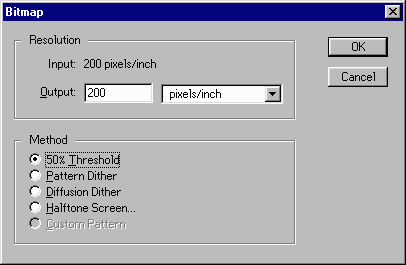
In Photoshop, select the Image Menu, then Mode and change the
image to Bitmap:

-
Select the 50% Threshold Method--which equalizes all the grays,
resulting in a black-and-white aliased image.
Exercise: Create an aliased image using the
antialiased image, PSantialias.gif; then insert it into a Web page
with a colored background.
See also, Weinman on using the lasso tool to create a photographic
transparent GIF.
